The Wall
| The Wall | |
|---|---|

| |
| Identifier: | North 3-3 |
| Area: | Lost Marshes |
| Puzzle Type: | Main |
| Previous Puzzle: | Possibilities |
| Next Puzzle: | Prison |
The Wall is the third main puzzle in the Lost Marshes area of The Talos Principle 2.
Puzzle elements
Overview
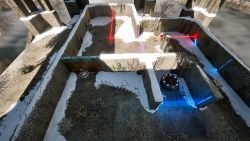
When you enter the puzzle, you find yourself in an L-shaped room. There is a swapper to the left with a driller in it, with a drillable wall immediately in front of it. There is a small room with the progress wheel in it, blocked off with a blue door. On the right, there is a hexahedron next to a blue door that is currently open. Through that door is the second room with a red receiver. That room leads to a third room via a purple barrier. There is a connector that is currently transmitting laser from a red emitter to the red receiver in the second room. There is a swapper further inside the room with a jammer in it.
Hints
A basic hint:
If you're struggling to get started:
If you're scared to disconnect the connector:
If you're not sure what the driller is for:
A list of major objectives:
